
N-MNIST SNN Conversion
A complete HowTo for converting a trained event-based N-MNIST ANN into a spiking network with NeuroCUDA, including published accuracy, prep scripts, and the claims this page will not make.
N-MNIST SNN conversion with NeuroCUDA takes a trained event-based ANN and compiles it to spikes. Install with pip install neurocuda from https://github.com/Krishnav1/neurocuda. Call snn, meta = neurocuda.convert(model, calib_loader). Published result: 99.88% ± 0.02% SNN vs 99.70% ANN on N-MNIST, an event camera dataset, not CIFAR images.
TL;DR
N-MNIST SNN conversion is the event-dataset path. Prepare tensors with examples/prep_nmnist.py, convert with snn, meta = neurocuda.convert(model, calib_loader), reproduce with python reproduce.py --quick. SNN 99.88% ± 0.02% vs ANN 99.70% on a 3-layer CNN. CIFAR ResNet is a different tutorial. SpiNNaker smoke tests are not this benchmark on chip. Loihi 2 is a simulator.
This page vs nearby pages: this URL is N-MNIST SNN conversion on event-based data. ResNet-18 SNN conversion tutorial is CIFAR-10 RGB residuals at T=32 - a different dataset and architecture. Convert PyTorch to SNN is the generic HowTo. Reproduce NeuroCUDA results is the seed-and-command page for both benchmarks. NeuroCUDA vs SpikingJelly is the training-library vs compiler decision. Do not collapse these intents onto one URL.
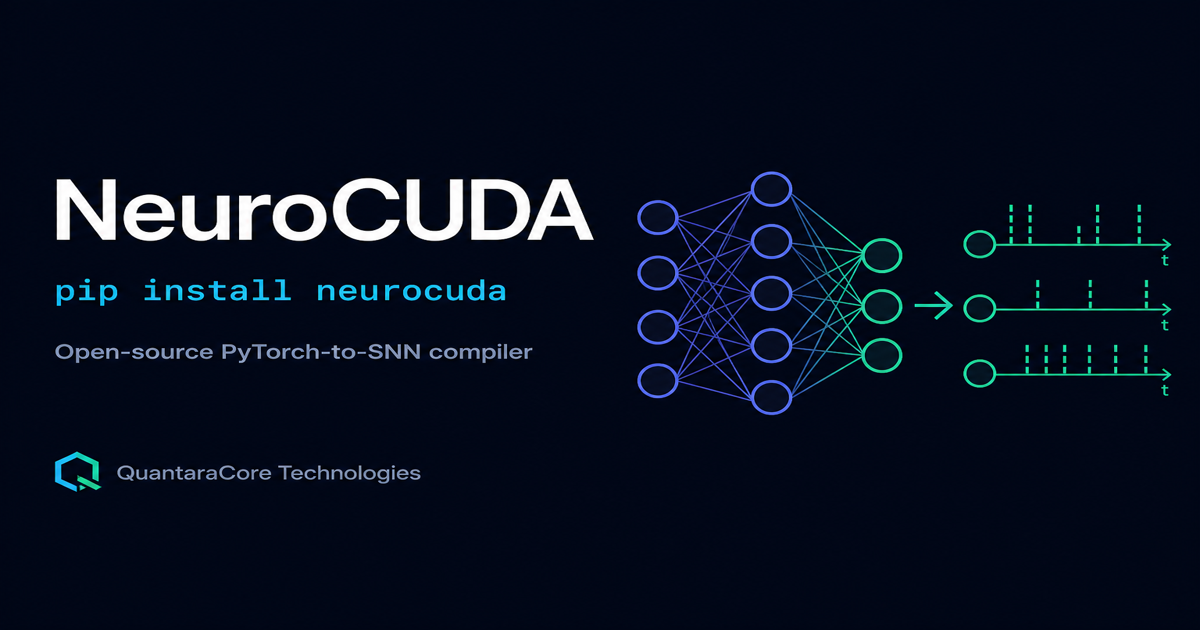
Teams search N-MNIST SNN conversion after they notice that neuromorphic papers do not train on CIFAR JPEGs. N-MNIST (Neuromorphic-MNIST) is MNIST digits recorded with a dynamic vision sensor: each sample is a stream of polarity events, not a 28x28 grayscale still and not a 32x32 RGB CIFAR image. If you copy the ResNet-18 CIFAR tutorial into this dataset, you will convert the wrong tensor layout and then blame the compiler.
NeuroCUDA is the conversion compiler for this job. Author: Krishna Santosh Varma, QuantaraCore Technologies LLP. Install: pip install neurocuda. Source: github.com/Krishnav1/neurocuda (MIT). Report: paper.pdf. This article is the event-based HowTo: what N-MNIST is, how to prepare it, how to convert, how to reproduce, and which hardware sentences are false.
What N-MNIST SNN conversion actually means
Conversion here means: train (or load) a conventional ANN on N-MNIST tensors, then compile that ANN into integrate-and-fire spikes with QCFS calibration and BPTT fine-tuning. It does not mean training a spiking network from random weights in SpikingJelly or snnTorch. Those are training libraries. Pairwise pages: NeuroCUDA vs SpikingJelly and snnTorch vs NeuroCUDA. Keep them off this HowTo except as "wrong tool if you already have the ANN."
N-MNIST was collected by displaying MNIST digits to an ATIS / DVS-style sensor so that contrast changes become ON and OFF events with timestamps. Typical converted tensors are two polarity channels on a 34x34 spatial grid, binned or rasterized into a short time window the ANN can see. That is still an ANN input. The SNN you get after conversion spikes. The dataset was already event-based before conversion, which is why a well-calibrated SNN can match or beat the ANN: the data's native language is spikes.
| Item | N-MNIST path (this page) | Not this page |
|---|---|---|
| Sensor / pixels | DVS events, ~34x34, 2 polarities | CIFAR-10 RGB 32x32x3 |
| Architecture in the report | 3-layer CNN | ResNet-18 |
| Published SNN acc | 99.88% ± 0.02% | 94.61% ± 0.14% (CIFAR) |
| Published ANN acc | 99.70% | 95.56% ± 0.11% (CIFAR) |
| Sparsity (report) | ~91.7% ± 0.5% | ~93.7% (CIFAR ResNet) |
| Prep script | examples/prep_nmnist.py | torchvision CIFAR loaders |
Published numbers for this conversion only
All figures below are from the NeuroCUDA technical report: full test set, 3 or more seeds, mean ± standard deviation. They are GPU/CPU software results.
| Metric | ANN baseline | SNN after conversion |
|---|---|---|
| N-MNIST test accuracy | 99.70% ± 0.00% | 99.88% ± 0.02% |
| Gap | - | SNN +0.18 percentage points |
| Sparsity | N/A | ~91.7% ± 0.5% |
| GPU vs CPU spikes | N/A | 0 deviations in the published 256k check (compiler-wide) |
The SNN beating the ANN on N-MNIST is unusual for naive conversion and expected when QCFS thresholds fit event statistics and BPTT is allowed a short fine-tune. Do not generalize it to ImageNet. Do not paste it onto ResNet-18 CIFAR, where the report shows a 0.95 percentage point drop instead. Do not call it SpiNNaker accuracy.
Step 1: Install NeuroCUDA
pip install neurocuda
# optional backends (GPU extras, Loihi 2 sim, NIR):
pip install neurocuda[all]
PyTorch and torchvision must already import. Confirm:
python -c "import torch, neurocuda; print(torch.__version__, neurocuda.__version__, torch.cuda.is_available())"
Install guide if this fails: pip install neurocuda guide. Colab path: NeuroCUDA on Google Colab. Neuromorphic CUDA context (GPU as SNN backend, not cuDNN): /neuromorphic-cuda.
Step 2: Prepare N-MNIST with prep_nmnist.py
Do not use torchvision.datasets.MNIST or CIFAR transforms. Event recordings need a dedicated prep path so calibration batches match test batches.
# from the NeuroCUDA repository root
# https://github.com/Krishnav1/neurocuda
python examples/prep_nmnist.py
examples/prep_nmnist.py downloads or locates N-MNIST, bins events into tensors the 3-layer CNN expects, and writes DataLoaders (or cached .pt files) for train, calibration, and test. Calibration must be in-distribution event tensors: same polarity layout, same spatial size, same time binning. If you calibrate on MNIST stills and test on N-MNIST events, conversion will look random.
import torch
from torch.utils.data import DataLoader

# After prep_nmnist.py, load the cached splits it wrote.
# Names below match a typical cache; inspect the script if yours differ.
calib_set = torch.load("data/nmnist_calib.pt")
test_set = torch.load("data/nmnist_test.pt")
calib_loader = DataLoader(calib_set, batch_size=64, shuffle=True)
test_loader = DataLoader(test_set, batch_size=64, shuffle=False)
If you are wiring a live DVS camera later, that is a ROS2 problem, not this HowTo. Sensor drivers and message types: event camera DVS ROS2. This page stays on the N-MNIST file dataset.
Step 3: Load the trained 3-layer CNN
N-MNIST SNN conversion in the report uses a small ReLU CNN, not ResNet-18. Train that ANN to about 99.70% before you convert. Conversion cannot invent digits the ANN never classified.
import torch
import torch.nn as nn

class NMNISTCNN(nn.Module):
    def __init__(self):
        super().__init__()
        self.net = nn.Sequential(
            nn.Conv2d(2, 32, 3, padding=1), nn.ReLU(),
            nn.Conv2d(32, 64, 3, padding=1), nn.ReLU(),
            nn.AdaptiveAvgPool2d(1),
            nn.Flatten(),
            nn.Linear(64, 10),
        )

    def forward(self, x):
        return self.net(x)

device = torch.device("cuda" if torch.cuda.is_available() else "cpu")
model = NMNISTCNN().to(device)
model.load_state_dict(torch.load("nmnist_ann.pth", map_location=device))
model.eval()
Input channels are 2 (ON/OFF), not 3. If your checkpoint was trained on CIFAR, stop and open the ResNet-18 SNN conversion tutorial instead. Mixing those checkpoints is the fastest way to a 10% "accuracy."
Step 4: Run N-MNIST SNN conversion
import neurocuda

snn, meta = neurocuda.convert(model, calib_loader)
# equivalent explicit form used in other guides:
# snn, meta = neurocuda.convert(model, calib_loader, timesteps=8, device=device)
print(meta)
That single call is the conversion. QCFS learns per-channel thresholds from calibration batches. BatchNorm folds. IF neurons replace ReLU. BPTT fine-tunes with an atan surrogate so spike rates track the ANN. Method background: QCFS ANN to SNN. If thresholds do not move, debug with QCFS threshold not learning before you rewrite the CNN.
Keep meta beside the SNN weights. It is how a later run proves it used the same calibration policy. Generic API walkthrough (frame datasets): convert PyTorch to SNN.
Step 5: Compile a backend
neurocuda.compile(snn, target="gpu")   # published accuracy path
# neurocuda.compile(snn, target="cpu")  # CI / no CUDA
# neurocuda.compile(snn, target="loihi2_sim")  # IF-neuron simulator, not Loihi silicon
GPU and CPU are the backends that carry the 99.88% figure. Loihi 2 is labeled simulator in every honest NeuroCUDA sentence. SpiNNaker-1 physical silicon is a separate smoke test of spike delivery on EBRAINS boards. That smoke test is not N-MNIST on chip. Do not write "we ran N-MNIST on SpiNNaker" because a two-neuron board job returned SUCCESS.
Step 6: Evaluate SNN versus ANN
ann_acc = neurocuda.evaluate(model, test_loader, device=device)
snn_acc = neurocuda.evaluate(snn, test_loader, device=device)
print(f"ANN: {ann_acc:.2%}  SNN: {snn_acc:.2%}")
# Expect near: ANN 99.70% , SNN 99.88% ± 0.02% across seeds
Evaluate on the full test set. Subsampled "looks good on 512 samples" is not the report. If the SNN sits near 10%, you likely used the wrong tensor layout, too few timesteps, or a dead-neuron reset bug. See SNN accuracy drop after conversion and dead neuron not converging.
Step 7: Sparsity and optional NIR export
sparsity = neurocuda.measure_sparsity(snn, test_loader, device=device)
print(f"Sparsity: {sparsity:.1%}")  # report ~91.7% ± 0.5% on this CNN

neurocuda.to_nir(snn, "nmnist_snn.nir")
Sparsity is the fraction of neuron-timesteps without a spike. It is a software statistic on GPU. It is not a joule measurement on Loihi or SpiNNaker. NIR export is the portable graph. Residual-heavy NIR checks belong to ResNet, but exporting the N-MNIST CNN is still useful for interchange. Dedicated export HowTo: export PyTorch to NIR. NIR concept page: what is NIR.
Step 8: Reproduce with reproduce.py --quick
# repository root: https://github.com/Krishnav1/neurocuda
python reproduce.py --quick
python reproduce.py --quick is the short published path for N-MNIST SNN conversion: prep, convert, evaluate, print the numbers you should be able to match within seed noise. Use it in CI after pip install neurocuda when you need a regression that is cheaper than the full ResNet CIFAR run. The longer reproduction page (seeds, both benchmarks): reproduce NeuroCUDA results.
convert() API. They are not the same article.Why the SNN can beat the ANN here
On dense RGB, conversion usually loses a little accuracy because spikes discretize ReLU. On N-MNIST the input is already a sparse event volume. QCFS thresholds that match that volume, plus a short BPTT fine-tune, can act like a regularizer: noisy analog activations collapse onto cleaner spike counts. The report's +0.18 percentage point edge is real on this 3-layer CNN and this dataset. It is not a license to claim "SNNs always beat ANNs."
If your converted SNN loses several points on N-MNIST, the usual causes are calibration on the wrong split, time binning that differs between train and test, or copying T=32 from the ResNet CIFAR write-up without measuring T on this CNN. Sweep T. Record it in meta. Do not guess from a different paper.
What this page does not claim
- Not CIFAR-10. Residual ImageNet-scale conversion is documented at ResNet-18 SNN conversion tutorial.
- Not static MNIST pixels. If you loaded
datasets.MNIST, you are not doing N-MNIST SNN conversion. - Not SpiNNaker N-MNIST accuracy. Physical silicon smoke tests prove spike delivery on board. They do not replace the 99.88% GPU number.
- Not Loihi 2 silicon.
target="loihi2_sim"is an equation simulator. - Not from-scratch SNN training. For that, see SpikingJelly or snnTorch. This compiler converts.
- Not a live DVS ROS2 bag replay. Drivers live on the event-camera post. A public bag-to-SNN demo is a future artifact, not this page.
Debugging checklist
| Symptom | Likely cause | Fix |
|---|---|---|
| Accuracy ~10% | Channel count 1 or 3, or CIFAR normalize | 2-polarity tensors from prep_nmnist.py |
| Accuracy 80-90% | ANN undertrained or T too small | Fix ANN first; sweep timesteps |
| SNN << ANN by >1 pp | Calibration split mismatch | In-distribution calib_loader |
| Works on GPU, fails CPU CI | Uncompiled backend / float policy | compile(..., target="cpu") and parity test |
| "We deployed to Loihi" | Simulator mislabeled | Say loihi2_sim |
| "We ran N-MNIST on SpiNNaker" | Smoke test conflated | Do not |
Broader conversion theory (not this dataset): ANN to SNN conversion tools compared and the SNN framework comparison. Field CUDA map: neuromorphic CUDA.
Event tensor layout and time binning
Most failed N-MNIST SNN conversion runs are shape bugs, not compiler bugs. N-MNIST events arrive as (timestamp, x, y, polarity). An ANN cannot eat that list. prep_nmnist.py bins time into a small number of frames or a two-channel occupancy map so a ReLU CNN can train. Whatever binning you choose must be identical for ANN training, calibration, and SNN evaluation. If the ANN saw 8 bins and convert() sees a single collapsed frame, QCFS will fit the wrong activation histogram.
Polarity is not an RGB channel. ON and OFF are independent event streams. Concatenating them as if they were red and green, then applying CIFAR mean/std, will shift every threshold. Keep polarity as two binary or count channels, zero-mean only if the ANN was trained that way, and never copy CIFAR normalization constants into this pipeline. Spatial size is 34x34 for N-MNIST, not 28x28 MNIST and not 32x32 CIFAR. Padding or center-cropping to the wrong grid silently destroys digit structure.
If you later connect a live DVS, you must reimplement the same binning in the ROS2 node. The file dataset HowTo ends at cached tensors. The camera HowTo starts at drivers. Linking them without matching time windows produces a model that scores 99% on N-MNIST files and coin-flips on the robot. That is an integration bug, not evidence that conversion failed.
After conversion: what to do with the SNN
- Keep the ANN checkpoint as the regression baseline forever.
- Log ANN acc, SNN acc, sparsity, T, seed, and
meta. - Export NIR if another simulator or collaborator needs the graph.
- If you later add ROS2, treat camera topics as a new input adapter. Do not assume N-MNIST binning equals a live DVS driver.
Framework shopping if you do not actually want conversion: SpikingJelly trains from scratch (see the vs page). GeNN and Brian2 simulate neuroscience models. Those are not N-MNIST SNN conversion.
Primary sources
- NeuroCUDA GitHub (MIT), github.com/Krishnav1/neurocuda -
examples/prep_nmnist.py,reproduce.py --quick - NeuroCUDA technical report, quantaracore.in/neurocuda/paper.pdf
- NeuroCUDA product hub, quantaracore.in/neurocuda
- Convert PyTorch to SNN (generic HowTo), quantaracore.in/blog/convert-pytorch-to-snn
- ResNet-18 CIFAR tutorial (different dataset), quantaracore.in/blog/resnet18-snn-conversion-tutorial
- Event cameras and ROS2, quantaracore.in/blog/event-camera-dvs-ros2
Frequently asked questions
What is N-MNIST SNN conversion?
N-MNIST SNN conversion takes a trained ANN on the event-based N-MNIST dataset and compiles it into a spiking neural network. With NeuroCUDA you run pip install neurocuda, prepare tensors with examples/prep_nmnist.py, then snn, meta = neurocuda.convert(model, calib_loader). Published result: 99.88% ± 0.02% SNN versus 99.70% ANN.
Is N-MNIST the same as CIFAR-10 or MNIST images?
No. N-MNIST is neuromorphic MNIST recorded with a DVS event camera: asynchronous polarity events on a 34x34 sensor, not RGB CIFAR frames and not static MNIST pixels. The ResNet-18 CIFAR tutorial is a different page: /blog/resnet18-snn-conversion-tutorial.
What accuracy does NeuroCUDA report for N-MNIST SNN conversion?
On a 3-layer CNN, the converted SNN reaches 99.88% ± 0.02% versus a 99.70% ANN baseline on the full test set, multi-seed. Sparsity is about 91.7% ± 0.5%. These numbers are GPU/CPU software results, not SpiNNaker on-chip accuracy.
Which script prepares N-MNIST for conversion?
examples/prep_nmnist.py in the NeuroCUDA repository builds the event tensors and DataLoaders used for calibration and evaluation. Do not feed CIFAR transforms into this path. Repo: github.com/Krishnav1/neurocuda.
How do I reproduce the published N-MNIST numbers quickly?
From the NeuroCUDA repo run python reproduce.py --quick after pip install neurocuda. The full methodology is in paper.pdf. Longer seed notes: reproduce NeuroCUDA results.
Does N-MNIST SNN conversion run on Loihi 2 silicon?
No. NeuroCUDA's Loihi 2 backend is an IF-neuron simulator. N-MNIST accuracy in the report is GPU/CPU. Do not label simulator runs as Loihi silicon.
Is the SpiNNaker smoke test N-MNIST on chip?
No. SpiNNaker-1 physical silicon confirmation is a spike-delivery smoke test on EBRAINS boards. It is not N-MNIST SNN conversion accuracy on chip.
Should I use SpikingJelly instead for N-MNIST?
Use SpikingJelly if you want to train an SNN from scratch on events. Use NeuroCUDA if you already have a trained ANN and need conversion. See NeuroCUDA vs SpikingJelly. This page is the conversion HowTo.
What is the convert API for N-MNIST SNN conversion?
snn, meta = neurocuda.convert(model, calib_loader). Then compile, evaluate, and optionally export NIR. Install with pip install neurocuda.
Where is the NeuroCUDA source for this HowTo?
https://github.com/Krishnav1/neurocuda, MIT license, documented here by Krishna Santosh Varma at QuantaraCore Technologies LLP. Hub: https://quantaracore.in/neurocuda.
Start now: pip install neurocuda · python examples/prep_nmnist.py · python reproduce.py --quick · Product page · PDF report